INTRO: On this tutorial we are going to learn how to add diffusion glow effect to your images. Personally I really like the results of this effect, it gives a great touch to every picture. This effect makes light skin glow while keeping dark areas.

1-Open the picture you want to use.
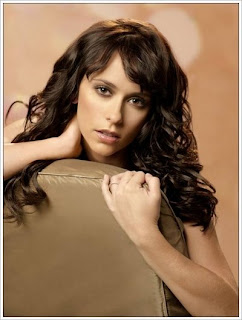 2-Duplicate the "Background" Layer to get "Layer 1" and change the blending mode of the duplicated layer to SCREEN.
 2-Duplicate the "Background" Layer to get "Layer 1" and change the blending mode of the duplicated layer to SCREEN.
 3-Now add a layer mask to the top layer so go to LAYER>LAYER MASK> REVEAL ALL.
 4-Make sure the Layer Mask is selected (The white border will let you know if it's selected, if not just click on the thumbnail).
 5-Go to IMAGE>APPLY IMAGE and use these settings:
 6-At the moment my image is like this:
 7-Now like we selected the layer mask on the step 4, let's select the "Layer 1" layer by clicking on the thumbnail. Remember this time don't select the layer mask but the image itself (white borders must be around the image).
 8-Go to FILTER>BLUR>GAUSSIAN BLUR and with the Preview Box checked add some radius until you get the desired result.
 9-It's time for us to add another Layer Mask. But we have a problem (Oh no!). Photoshop only allow us to add a Layer Mask per Layer, so what can we do? I have a solution mates! We will simply group the layer so go to LAYER>GROUP LAYERS or press CTRL+G.
 10-Now we are free to go. With "Group 1" Layer selected go to LAYER>LAYER MASK>REVEAL ALL.
 11- Select the Layer Mask of "Group 1" layer and go to IMAGE>APPLY IMAGE and use these settings:
 12-And here are done here my friends, hope you liked it :)
Kal El


