Today we are going to use an easy way to create our own POST-IT's on Photoshop. On we go mates :)
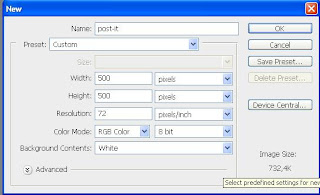
1-Create a new document with the following settings:
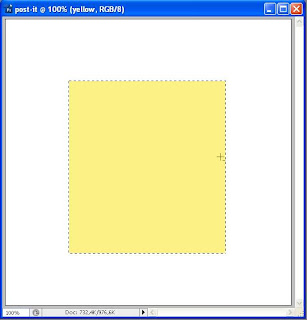
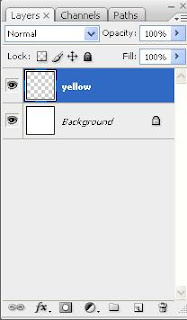 3-Now, select the Rectangular Marquee Tool and draw, with the SHIFT key pressed draw a square shape.
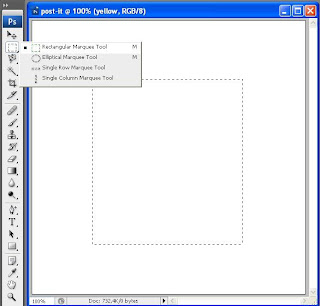 4-Choose your foreground color to a yellow color. Here I used #fcf185, and then click ALT+BACKSPACE so the square shape will be filled with our selected color or you can use the Paint Bucket Tool to do the same effect.
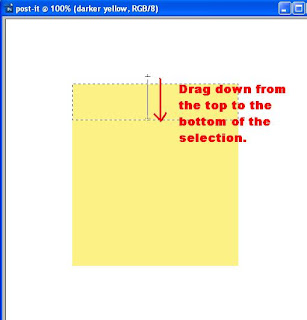
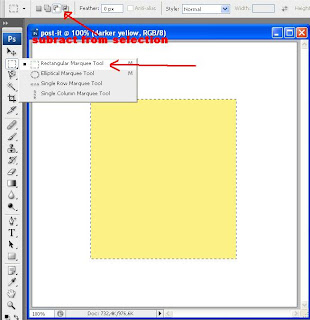 7-Now create another square shape on the bottom of the our figure to deselect that part, because we only want the top of the selection that we created on 3rd step.
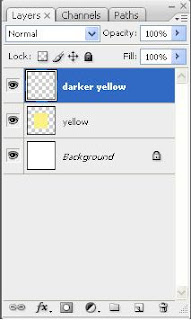
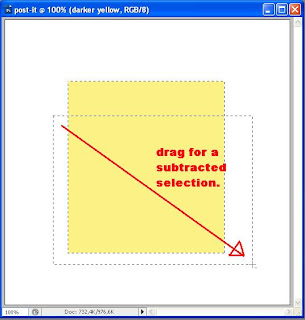 8-Choose a darker yellow as your foreground color (#ece179), select the Gradient tool, and choose the gradient that goes from dark yellow to transparent.
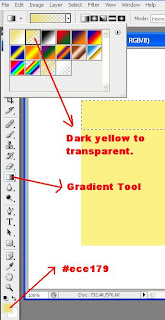 9-With the Gradient tool select drag from the top of the selection to the bottom. And click CTRL+D to deselect our small selection.
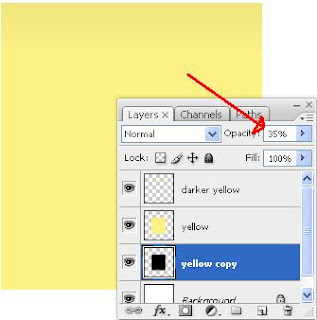
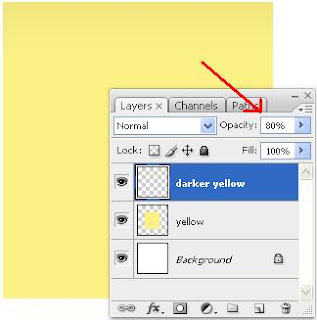 11-Click to select the layer named "yellow" and press CTRL+J to duplicate it. And on the duplicated layer click CTRL+U to open the Hue/Saturation settings, and you'll have to define the value of lightness to -100% to make the layer completely black. To finish this step, place the duplicated layer below the "yellow" layer and lower it's opacity to 35%.
 12-Now, select the "yellow" layer and go to EDIT>TRANSFORM>WRAP. Drag the bottom right point to raise the Post-it edge. When you are happy with your effect click ENTER to leave the transformation mode.
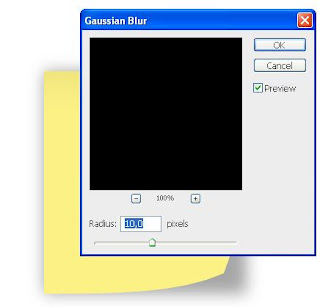
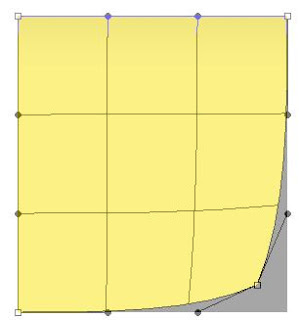 13-You can do the same for the bottom left point or leave it as it is. Select the "yellow copy" layer that is our shadow and go to FILTER>BLUR>GAUSSIAN BLUR and set the value of the radius to 10.
 14-At last, select the Horizontal Type Tool and write whatever you wish on the Post-it. Change the opacity of the text layer to 63%.
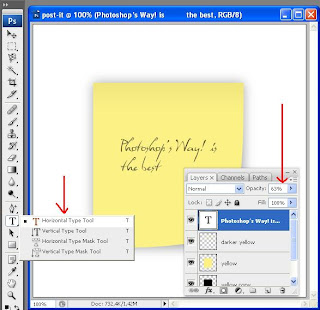 15- Here is my result. I decreased the size of the shadow to make it more realistic, lifted another point of the Post-it at left.

You can download the tutorial and the file here (The new function of our blog)
Password to unzip: photoshopsway
Password to unzip: photoshopsway
Hope you enjoyed.
All the best :)
Kal El
Credits for the owner of the idea of the Post-it Tutorial:
All the best :)
Kal El
Credits for the owner of the idea of the Post-it Tutorial:


1 comments:
Olá, gosto muito dos teus tutoriais!! Sempre aprendo alguma coisinha nova que não conhecia do photoshop... é engraçado que já trabalho no photoshop há mais de 5 anos e de cada vez que vejo tutoriais aprendo algo novo ou descubro formas novas e, às vezes, mais simples de fazer determinadas coisas.
Continua!!!!
Post a Comment